Wednesday, January 10, 2018

Pin Cushion


  1. Pin Cushion 


What you will need:

Scraps of fabric
Embroidery floss, craft stuffing (batting)
Basics – needle, thread, scissors

Use a plate or bowl about 6” in diameter to trace a circle onto your fabric.  

 Cut 2 circles out.


Place right sides together, pin in place. 


 Stitch around outside edge, learning a 1” gap for turning.   Clip seam allowance, being careful not to clip through the seam.  (When we sew an outside curve, we want to notch the seam allowance to reduce bulk when we turn it right side out).


Turn right side out. Stuff with batting.  Hand sew opening shut. 


 Thread needle with 3-6 strands of embroidery floss; tie knot in one end.  Stitch through middle of cushion, stitch about 5 or 6 loops around edge of pin cushion.  Finish off with a button on one side.  Tie 2 knots on bottom side before cutting thread.  Fill with pins:)  


Lined Zippered Pouch


#2. Lined Zippered Pouch 

What you will need:

fabric scraps
zipper (at least 6")
Basics-scissors, thread, pins

1. Cut 4 fabric rectangles, measuring 4 x 5 1/2” each.


Attach zipper foot to machine (if you have questions, check your machine's owner's manual).  Line fabric up in a sandwich: right sides of one lining and one fashion side together, zipper in the middle with zipper edge along seam allowance edge. 


Making sure the zipper is on the correct side of the zipper foot, sew seam.  Repeat with other side. 


Optional:  if desired, you can topstitch the zipper seam.


 Leave the zipper undone half way.  We will need this opening to turn the pouch.


Fold pouch wrong side out, with zipper head facing in.  Line up sides and pin carefully, making sure there are no fabric folds.


Starting at one end of pouch, sew very near the zipper and around the edges to the other end of zipper.

Clip zipper and then the corners to reduce bulk. 


Optional:  You can sew a zig-zag stitch around the outside the seam to keep the edges from raveling.

Turn right side out, poking corners out all the way.


 All done!!!  Congratulations!  :) 

Denim Bag

#3. Denim Rag Bag 


What you will need:
old pair of jeans
heavy or medium weight interfacing (pellon) 
rag quilt clippers
sewing basics


  1. Pick the parts of the jeans you would like to use.  Example: pockets, decorative parts, etc. Design your bag according to the shapes and sizes of these pieces.  (or if you want to keep it simple, plan for 9x9” squares and make sure your designs will work-mine were longer than 9” to accommodate for the pocket size).


  1. For 9x9” squares, cut 8 out of denim, 8 out of fabric, and 8 squares of 8x8” pellon to give the bag body. We will also need a a strip of fabric to use for the sides of the bag as well as the strap. 


 Layout pieces in the desired design and start by sewing 2 blocks (wrong sides together and pellon sandwiched inside) together and then sew those 2 to the next 2.  
Sew along edges of strap, 1/2” in., or fold strap in half and sew one side 3/4” in.  


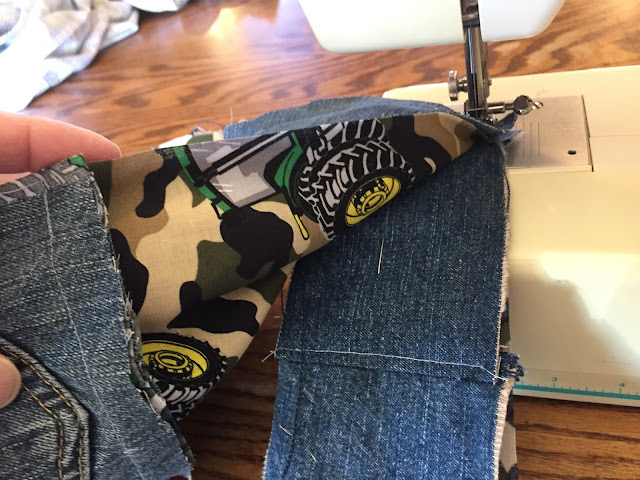
 When both sides of the bag are assembled, pin strap in place.  We will leave it in one long pieces and just turn on the corners.  Sew to one side, then pin and sew to other side.  I like to make sure all the “rag” edges are going to be on the same side of the bag.  (This makes it reversible:) 

 Measure around your bag and add up to 28”, depending on how long you like your strap.  Width can be whatever you like, this one is 4”.  Cut pellon the length of the fabric strap and 1 inch less in width.  Pin 3 layers together of all pieces and sew in place (with x’s on the squares). 


 Sew strap end to strap end on bag, starting and stopping at seams.  


  1. Very carefully clip raw edges with rag quilt clippers.  Yes, these clippers are just as happy to clip thumbs and they are to clip fabric.  OUCH!!!
Sew along top edges of bag.


  1. Wash and dry bag BY ITSELF- it will shed lots of threads that you don’t want to see on your others clothes.  Enjoy:) 


 These pants have lots of possiblities:)

Sewing a Mask

  Supplies needed:  scrap fabric, elastic It is helpful to have 2 different fabrics, so that when your are wearing it,  you always know whic...